How To Access Computer Files Wirelessly From Another Computer or Phone (Using Connectify Hotspot)
I recently shared an application called Connectify Hotspot in an earlier post, an application meant to create a virtual router within a PC to share internet access to other devices. Within the same post I mentioned it's not limited to that functionality but also lets users share files wirelessly. It's within this post that I will explain how it can be used to for the second purpose.
Accessing files remotely in this case works on a concept that if two computers are connected to the same wireless network provided by a local router, one or both of the computers can be configured to have their files accessible remotely from any of the two computers or any other computer connected to the same network. So if two computers are used then a router has to be in place which makes three devices. Also to note, internet access is not required to share files. All that's needed is the wireless connection.
The only tiny difference in this case is that the router being used here is not a physical one but a virtual one created within one of the two computers. This is virtual router that Connectify Hotspot creates. So instead of having three devices in place, all one needs are two computers that will share data and Connectify Hotspot installed either of the two. When Connectify Hotspot is started in either of the two computers, it creates a hotspot onto which another computer or phone connects. Simply implies that the computer from which the hotspot is created also contains the virtual router and at the same time will behave as though it's connected to the same virtual router..
Without the necessary configuration, even if a router is in place and two computers are connected to it, one can't access files from another computer connected to that network.
To be able to access files in another computer, specific drives or folders have to be shared.
How to share drives or folders
Let's take for example one wishes to share a full drive on a network (Local Disk D: For example)
1. Right-Click on Local Disk (D:) and click on 'Properties'
2. A dialog box will open. Click on the 'Sharing' tab
3. Click on 'Advanced Sharing' and another dialog box will open
4. Check 'Share this folder'
5. Click on 'Permissions' and another dialog box should open
6. Click on 'Add' and another dialog box should open
7. Type "Everyone" in the provided box and click OK
8. Highlight 'Everyone' and check 'Full Control'
(Note: You may not check 'Full Control' and choose a few permissions depending on what you want if you don't need another computer or device to have total control over your files when allowed to access them. I will give a general guide to give a general overview)
9. Click 'Apply', 'OK', the same on the next earlier opened dialog box
10. Click on the 'Security' tab on the 'Properties' dialog box
11. Click on 'Edit' then 'Add'
12. Type "Everyone" in the provided box and click OK
13. Highlight 'Everyone' and check 'Full Control'
14. Click 'Apply'
15. Click 'Continue' on any dialog box that may display
16. Click 'OK' and close the 'Properties' dialog box
Now Local Disk (D:) (or any selected Local Disk) can now be seen on a network, it's content modified and shared from a remote computer allowed to access it.
The same procedure can be used to share independent folders to easily access them on a network rather than accessing them through a shared disk.
Note:
On a system disk (usually Local Disk (C:) on many computers), to have files easily shared, the above procedure must be carried out on the Local Disk and independent folders to be shared for example 'Documents', 'Pictures', 'Music', 'Videos', 'Downloads' have to also be shared using that same procedure above. You can access such folders in System Disk (C:)>>Users>>[Account Name]>>[Folders]. You will not be able to access these folders on a network through the system disk if they are not independently shared. This only applies to system disk.
Now the necessary devices have been shared but there are some other few network settings that may need to be changed for easy access.
- Go to Windows start menu (or Search on task bar) and search for "Network and Sharing Center" and click on it to open
- Click on 'Change advanced sharing settings'
- Expand 'Private (current profile)' and enable 'Turn on network discovery' and the rest as shown
- Expand 'Guest or Private' and do the same as shown below
- Expand 'All Networks' and enable the following as shown
(Note: Turn password protection sharing to prevent anyone connected to your network from accessing files anyhowly or Turn it off if you wish to easily access files without login credentials prompt)
- Save changes
At this point, all the configuration is done. To access shared files, Connectify Hotspot should be started on one computer and another should join that network created by Connectify. Once connected to access shared files the user should go to 'Network' section. The user should as well turn on Network Discovery to view connected devices if any prompt displays.
Once the connected device is opened, the connected device should be seen.
The shared drives/folders on the connected computer will be displayed when the connected device is seen (You may need to refresh the window if the shared files don't display instantly)
To access files from phone (Android)
1. Install ES File Explorer
2. Connect phone to Wi-Fi created by Connectify Hotspot from PC
3. Open ES File Explorer
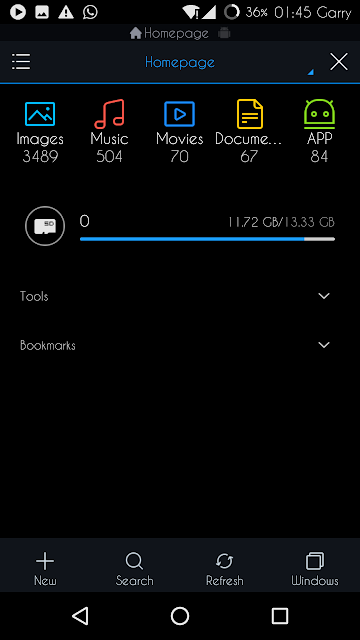
4. Tap on the humbugger menu on the top left

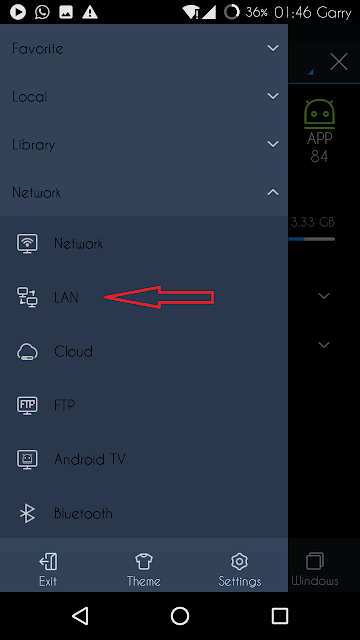
5. Expand 'Networks' section and tap on 'LAN'
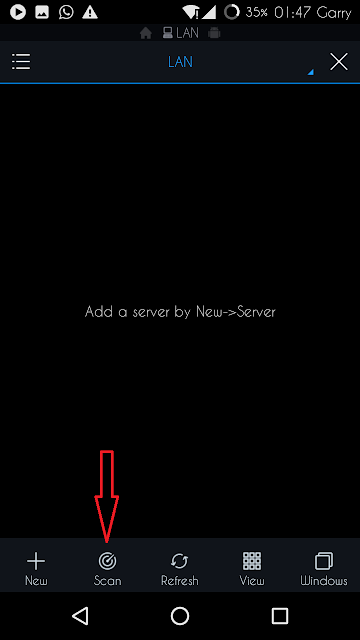
6. Depending on the ES File Explorer layout chosen, there should be a 'scan' option
7. Scan for any connected devices
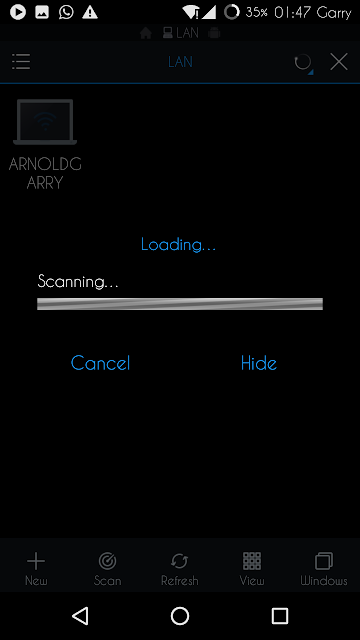
8. You should see the computer that provides the hotspot (on which shared drives/folders are) and any computer that may be connected to that Wi-Fi hotspot)
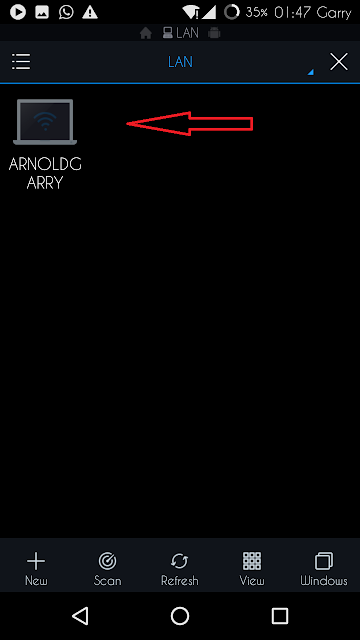
9. Open it and you should see the shared content.
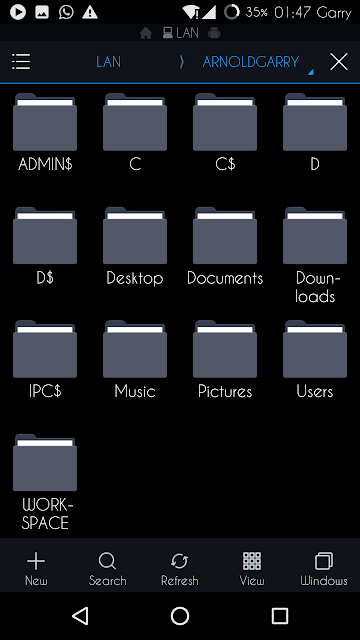
Done!
You can then view remotely, open or play remotely, copy/cut to and from, delete or modify as you please, remotely.



No comments